As people have been staying at home during the past pandemic, many are seeing the need to develop a green thumb, passing the newfound time on their hands with gardening. For some, this newfound hobby and interest in gardening are an attempt to ensure they have access to fresh food caused by shortages of produce in grocery stores. And as this Plandemic moves forward and we start getting back into the swing of things, they want to have the surety that if this were to happen again that they will be better prepared for the economic interruption.
Home vegetable gardening has surged across the country for many Americans and has led folks to empty out nurseries and garden centers of vegetable transplants and sweep the shelves clean of seeds and gardening tools of retail stores. This is always the first line that goes when people see trouble on the horizon economically.
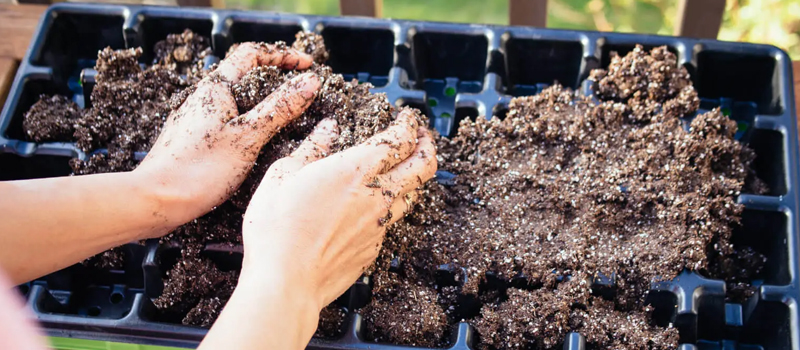
Buying the vegetable starts is a good way to begin, but as you progress along this gardening path, there will be a need for you start your own seedlings and get the ball rolling that way is more cost-effective. However, during this time when seeds are scarce and our newfound or fortified love of gardening and vegetable gardening is at its peak, how does one ensure our gardening future?
Save your own seeds.
Growing vegetables, plants, bushes and even trees from your own seeds is probably one of the most fulfilling achievements of Wild Edibles gardening. Planting a garden, enjoying the harvest, AND then collecting the seeds from that harvest to grow again for next season is the most complete and perfect form of gardening. In fact, I call it Gardening Sustenance. The simplest and quickest plants to start your hand at harvesting your own seeds are from annuals. By definition, annuals complete their life cycle in one year. That means the plant will flower, set seed and then die in one year’s time.
As the research shows getting your initial seed stocks from non-GMO sourced seeds are the best. You want to have the heirloom seeds as the beginning genus of the seeds stores you want to harvest and keep over those that have been genetically modified by the likes of Monsanto and others. Choose open-pollinated varieties over hybrids because they will be true to plant type. Some open-pollinated varieties are “heirloom,” meaning they may be passed down through the generations.
Some examples of easy-to-save seeds are all kinds of beans (string, lima), lettuce, greens (spinach, chard, cabbage), herbs, okra, peas, peppers, and heirloom tomatoes just to name a few. They all produce seeds in the same season they are planted. All are all self-pollinating, and with just a couple of fruits, you can reliably harvest seeds.
Some things to get straight before you begin:
- There are dry fruit and wet fruit. Dry fruit is the easiest to collect seeds from because you can essentially walk to your garden, harvest a few mature seedpods and bring them into the house to dry, clean, and store. Csusz. All done.
- Fruits that are considered wet fruit crops, such as squash, cucumbers, tomatoes, and eggplants, must be picked when their seeds are mature and must be processed according to the fruit type.
To boot there is an added concern that seeds are not always mature when the fruit is ready to eat. For example, eggplant, cucumber and summer squash are eaten when the fruits are immature and still edible before the seeds are actually mature. This is easily resolved by letting a couple of fruits be left to fully mature in the garden to save for thw wanted seeds.
The Best Technique for Drying
For achieving reliable seeds is to dry them appropriately. Do not dry seeds on paper towels, plates, or anything they will stick to and become damaged. Surfaces such as mesh that allow airflow are the best. Turn drying seeds a couple of times a day and avoid direct sunlight. Use a fan to increase air circulation. Give them the time to dry naturally, so no putting them into anything like an electric dryer either.
Let’s get started with some of the easiest seeds to save and a few techniques for each type.
- Peppers are a breeze. When the vegetable is ready to eat, the seeds are mature. Cut the central stem of the pepper with the seeds, brush the seeds onto a screen or metal mesh (plastic, ceramic or glass plates are okay) and let them dry out.
- Squash, zucchini, pumpkins and all other plants in the gourd family Cucurbitaceae are done similarly to peppers. Open the vegetable and scrape out the seeds. Wash the seeds, and as the water goes over them, rub the seeds with your fingers to remove debris. Once again, put them on a plate or flat surface to dry.
- For melons of any type, remove seeds from the center of the fruit and rinse them in water. As you rinse them, rub the seeds to remove debris and get that slimy feeling off. Put the seeds into a container filled with water. Good melon seeds will sink, so remove everything that floats. Rinse the seeds again and then lay them out to dry. Cucumbers seeds can also be harvested this way, but wait until the cucumber is beyond ripe, changes color, and becomes soft.
- Peas, beans, and okra all have pods and are easy to gather and save. For the purpose of seed saving, wait until the pods mature on the plant — usually after they turn brown. Remove pods from the plants, then remove the seeds from the pods. Put seeds in a container and stir them often to help them dry. Peas or beans take about six weeks to air dry.
- Greens such as lettuce, collards, mustard greens, kale, and her such as fennel, dill and basil are rather simple. Let the plants go to flower and let them set seed at the end of the harvest season. Seeds can dry in their pods on the plant, and then “bag the heads” by placing a paper bag over them and pulling off the seeds.
- Tomato seeds are a wet fruit and are covered in the gel-like substance that must be removed before they dry. It’s a bit of a fermenting process. Remove seeds and place them in a container such as a glass jar or plasticware with equal parts water to seed mass. Stir the seed mixture once a day for a few days. After a couple of days, viable seeds will sink. After five days, throw away anything that floats. Separate and wash the seeds and dry them by placing them on a screen or wire mesh (plastic and glass are okay, too) in a single layer in a warm area. Keep them away from sunlight throughout the entire process and dry as quickly as possible.
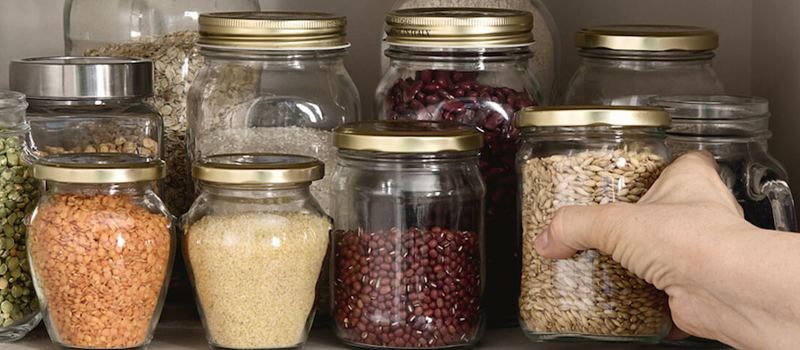
Be sure to properly store your seeds in an airtight container or dry paper bag placed in a cool, dark and dry area. Seeds can be viable for many years, and many more if you freeze them. Don’t forget to label your seeds, you don’t want to be guessing what you are planting for sure.
Overall TakeAway
As it has been created, with ust a little planning on our part we can continue with what Providence has set nature to do. You can continue to grow your knowledge and expertise with each harvest you have with the right seeds to build upon. When you are looking to remain self sustaining as the markets continue to flex and money values fluxuate, you too can be calm in the face of the storm.
Saving your own seeds ensures you have a garden to grow every year. It’s extreme gardening, but gives you the peace of mind you are searching for as well.


