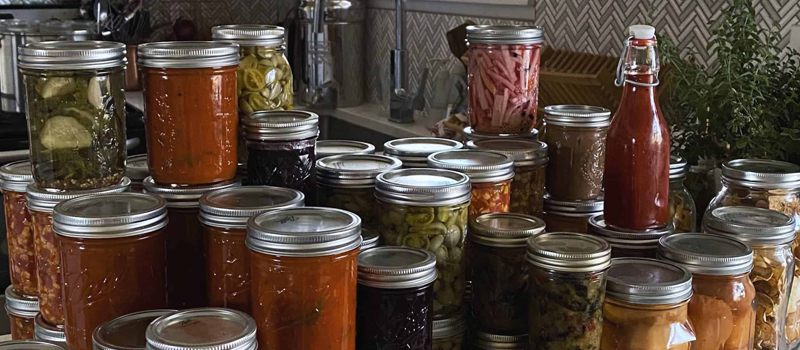
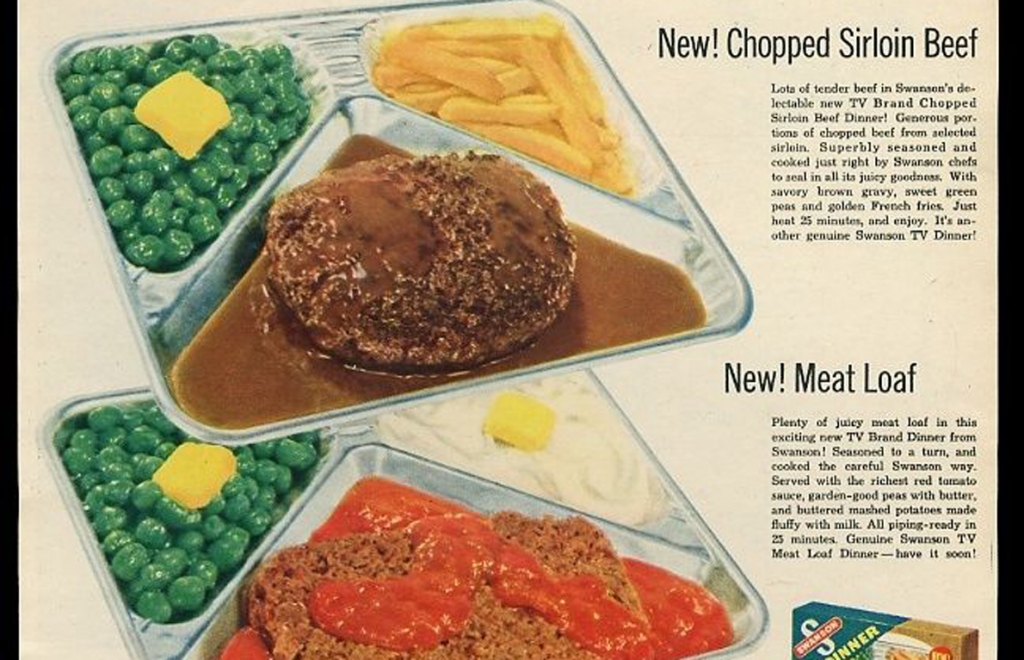
 Like many of us born post 50 years after World War II, I grew up in a family and in an area that was an “asphalt” type of lifestyle. My parents grew the backyard garden, and we occasionally would turn the harvest into a canning project. This slowly gave way because of time and convenience that commercially prepared food, especially TV dinners, was the only way to go. Not only that, cereals, spreads, and cheese became more processed than natural. Often these mass-produced products always come with questionable chemicals and preservatives. Today, home canning is a simple way to take greater control of your health and well-being, and of your budget.
When you move from the processed to the natural and as well as moving more towards a remote, rural area and mindset one of the ways to do that is to become an enthusiastic home canner. You’ll quickly see the value of preserving food for yourselves. If you find that you need more info, look for your County USDA Extension office or the Utah State University Agriculture Extension that teaches food preservation skills classes.
Here are some essential details that no one else ever seems to tell you and would be crucial to know –
Updating your recipes
Make sure that the Canning Recipes you get, whether they be online or in a book, that they are up to date with the comprehensive processing and safety guidelines. Why do I say that?
It is an unfortunate thing, but many of the seeds that we now have access to and the food that comes from that have been genetically modified from those even 40 years ago. (If you are stringently using heirloom seeds and can verify the sources you are buying them from then… never mind use all the old canning recipes you would like!) Along with their R & D, they have improved things like pest and disease resistance by changing their acidic makeup among other things.
So if you are thinking about using the veggies and fruits from your local grocer chain, get updated canning recipes. If you are using ONLY heirloom seeds then feel free to use the oldies but goodies books from grandma and great-grandma.
Maintaining your pressure canner
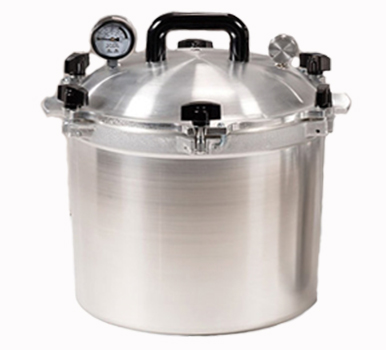
People who regularly use pressure canners often think they can last a lifetime without any maintenance. That would be a sad mistake if you were to think that. Several of the features of a pressure canner need to be checked regularly or replaced to keep the canner in safe working condition.
Gaskets: Pressure canners use a rubber gasket or sealing ring in the lid. These rings tend to dry out, crack, stretch, harden, or become damaged over time and use. Steam-borne food particles can work their way around the gasket as well. When anything messes with the seal, the canner will not maintain pressure properly. Remove and carefully inspect the gasket and replace it when necessary. You can often find replacements at hardware stores or from the manufacturer. Never use a pressure canner that has a bad gasket! I repeat, don’t use it if it has a bad seal on the gasket!
Safety Plugs: Pressure canners have as a safety feature plugs that fail to prevent explosions by releasing the pressure if it becomes dangerously high. They can be metal, designed to melt under extreme pressure, or when the pressure canner boils dry; or they can be of composition rubber, which is blown out by the high pressure that is generated. Either can become damaged in the same ways as a gasket or gauge. Unfortunately, replacements will probably have to come from the manufacturer.
Dial Gauges: You should also test your dial gauges for accuracy once a year on the canner. Like other mechanical devices, these gauges can get old and malfunction. They can also become inaccurate from the hazards of use, from getting hit or exposed to extreme heat sources, or cold when not in use. Ask the almighty Google on how you can have your gauge checked.
Vent Port: Finally, a pressure canner will have a vent port, used with either a weighted gauge or petcock, which the user can control to release or hold pressure in the canner. These can become clogged with particles of food. Clean them by drawing a string through the opening.
Anyone who uses a pressure canner should always keep replacement parts, a manufacturer’s guide for their specific model, and the USDA pamphlet on pressure canner maintenance (you can find that online). Don’t wait until something breaks or fails unexpectedly.
Disposing of spoiled food
Spoiled food is a hazard of the canning efforts. Whether it is because it didn’t seal right, or it was exposed to a bacteria, or that it is simply aged out of the nutritional spectrum. The need for safety here can’t be overemphasized. The organisms that spoil canned food are poisonous to humans across the board, especially in the quantities present in a jar of canned food.
The most potent spoilage organism in low-acid foods is obviously botulism, which produces a powerful neurotoxin that will shut down your nervous system. Don’t have to say that you don’t want to mess with that. Low-acid foods that have spoiled should be disposed of with the utmost caution because the botulism toxin can be absorbed through the skin. Handle any spoiled food from the canning process with the utmost care and caution.
First, when you find a spoiled jar, there just may be spillage and a mess on the shelf; put it down immediately and wash your hands. Get yourself a sanitizing solution of ¾ tsp. bleach to 1 cup of water, preferably in a spray bottle and sanitize your bare hands. Put on rubber gloves to dispose of the spoiled food one of these three ways:
Disposal method #1: Put the jar in a heavy plastic bag, in act put it in two and chuck it in the trash with the bag twisted shut. You aren’t finished just yet. Use the sanitizing solution and a paper towel to clean up any dribbles or splatters, including on the shelf where the jar was stored and on the sides of the surrounding jars. Then wash and sanitize your rubber gloves while still wearing them.
Disposal method #2: Put the jar in the plastic bag, and take it to the bathroom. Carefully, without any splash, open the jar over the toilet and pour its contents into the bowl, flushing several times. You’ll have to thoroughly sanitize the toilet, get it scrubbed a few times with that bleach concoction. Then take the bag with its jar and soak it in sanitizing solution (a ratio of 1/8 cup of bleach to each gallon of water). After 15 minutes or so, drain and dispose of the bag and the gloves, and then wash the jar in Dove and hot water.
Disposal method #3: Put the jar in a plastic bag and take it outside. Dig a deep hole (2 feet or more) and bury the contents. Clean the jar and dispose of your gloves as described above.
Canning is a fine home craft. Be diligent in your methods, and the uses of what you are wishing to preserve.


