Canning has been an important part of food preservation ever since it was discovered. To have the ability to preserve food beyond its natural cycle is a phenomenal feat. To have that ability to eat, and be nourished in the cold times from what was harvested in the warmth of summer is a simple miracle not to be lost in its commonplace found today. You and I both can enjoy the sweet smell of fresh peaches simmering in syrup and the pungent spices used for making pickles. To pick those fruits and vegetables when they are ripe and to have them available months and even years later is a masterpiece given by the Divine.
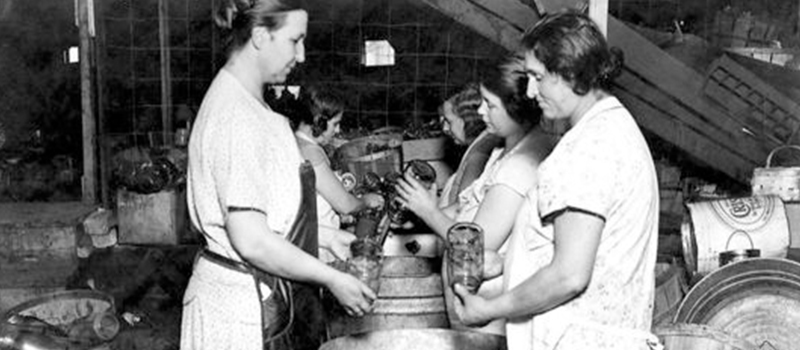
My grandparents grew up and were young parents who experienced the Depression nearly 100 years ago, I realized what a wonderful thing it was to have the ability to have a pantry chock-full of all sorts of foods; the peace of mind that such brings is magnificent! Once properly canned and stored in the pantry, any food not eaten during the winter will remain good for years, without losing any of its gourmet taste or nutrition.
Ever since the passing of both my grandmas, I’ve missed those sights and sounds. Those smells and suppers and that peace of mind of which they did, had brung to my heart. It wasn’t too long ago that I returned to those lessons once learned and brought back home canning as an important part of my quest for a self-reliant lifestyle. And, tell you what, have I canned a wide variety of foods! From pickles, jams, jellies, and preserves to venison, pork, beef, chicken, meals-in-a-jar, stews, and soups. I’ve canned them all
I’ve found that there are a certain number of common mistakes that folks (me included) have made. So in the interest of being able to save my and your next canning batches, here are a few mistakes that home canners make and some advice on how to fix these mistakes.
 “My Jars Just Didn’t Seal!”
 “My Jars Just Didn’t Seal!”
This happens ordinarily enough in a water bath that there should be no concern about it. Having one or two Jars not seal is easy to reprocess. Make sure there isn’t anything hindering the seal, a dent, or food particle at the rim and with a new lid and process it within 24 hours. Or it can be tomorrow’s dessert or a side dish.
If by chance, more than one or two jars fail to seal continually, there is a definite reason. And the most common reason is usually operator error of not reading directions close enough. Canning is definitely not brain surgery, but you do need to follow precisely canning recipes and the directions for every food you are preserving, every single time. Do this and you’ll have fewer failures along the way if you do. Follow the Canning Recipe precisely!
Another way that seals on the lids are failing is that you haven’t let them soak long enough. Meaning some people start their timers when they place the jars in the water… if you are, that is way too early. The timer should be started from when the water starts boiling. That is when the process starts, and if you are too early taking them out, then it is no wonder some are not sealing for you.
When you look to reseal, examine every jar before you fill them to check for nicks or cracks in the rim of the jar. Always be sure to wipe the rim of your filled jars with a damp, clean cloth to remove any food bits or grease before putting on the lids. When they are done processing, DO NOT WIPE the jars and lids before they are cooled. The lids will not seal properly if you do this. Wait until the jars have cooled completely, then you can take off the rings and wash the jars thoroughly under warm, soapy water with no ill effect.
Also, be sure to put your hot, processed jars onto a folded, dry towel away from cool breezes. Setting hot jars onto a wet towel, on a bare countertop, or next to an open window can cause broken jars.
“My Jars Have Unsealed During Storage”
To have this happen once in a while is common enough, but it should not happen very often. If more than one jar in a large batch comes unsealed, or this starts happening frequently, Houston, you have a problem.
The most common cause is that food bits or something else have become trapped under the lid during the process. Make sure you wipe both the rim of the jar and the threads of the jar to remove any clinging food particles before putting the lid and the ring on the jar. Another no-no is to vary the pressure during the canning seal process which often blows liquid and small food particles out of the jar. These particles sometimes get stuck under the lid and around the rim of the jar, causing an inevitable seal failure.
Incorrectly exhausting steam before shutting your pressure canner can also lead to food spoilage. Most canners require 10 minutes of steady steam escaping from the vent before you begin processing by flipping down your petcock or putting your weight in place. The steam should not come out in spurts; it should be steady and vigorous. If you shut your canner too soon, the food often will not heat for long enough during processing and can spoil in storage even if the lid appears to be sealed.
Another common cause of the failure of the seal while in storage is packing the food too tightly into a jar, and not using the required headspace. Food swells during processing and touches the underside of the lid, sometimes causing seal failure on the storage shelf.
Not removing air bubbles trapped in the liquid when you pack your jars will also cause seals to fail in storage. Take the time to slide a plastic or wooden spatula or chopstick down inside the jars to release any air bubbles.
Make sure you follow the recipe directions. If the food has not been processed for the correct time, it won’t stay sealed. Never take shortcuts, thinking that 30 minutes is as good as 40 minutes in a pressure canner. Don’t overthink it, just follow the directions and you will minimize the unsealing dilemma.
“The Bottoms of the Jars Have Broken Out”
This can be common during water bath canning. The reason is simple: hot jars put into a cool canner or cool jars put into a boiling canner make the bottoms of the jars crack and break during processing. Always make sure your jars are hot and the canner a little below boiling before you put them together. You can hold your jars in another canner full of boiling water or even hold them in a sink full of hot water so they stay reliably hot. Then pack them quickly and put them into a very warm canner. Even when pressure canning, I always take the time to heat my canner a bit so I’m not putting hot jars of food into a cold canner. By doing this simple step, I have no jar bottoms break during processing.
Another cause of broken jars is setting your jars of hot, processed food directly on a kitchen counter or table to cool. Setting them near an open window with a cool breeze blowing on them will also cause breakage. So will canning outdoors and putting the hot jars, right out of the canner, on a table in a windy area. Make sure there is no wind or breeze, and always set your hot jars on a clean, dry towel and they will cool safely … in one piece!
“The Liquid is Blowing Out of the Jars”
Having the liquid coming out of the jars during canning can happen for a couple of reasons. The first and most common reason is letting the pressure variations happen during processing. Let’s say you are canning at 12 pounds pressure but it slips up to 15 pounds before you notice it. It is better to slowly bring it back to the right pressure. Don’t quickly turn off the heat and let it go to 12 pounds, this can cause liquid to blow out of the jars. Opening the canner too soon after processing or bumping the weight a few times to “hurry” things up will also cause liquid to blow out of the jars. Wait five minutes or so once the pressure goes back to zero after your batch of jars has processed fully, Then release any steam and remove the lid of the canner.
Don’t try to save jars by over-packing food either. Filling the jars past the recommended headspace will also cause liquid to blow out. Save yourself the headache of cleanup and waste of food, and just follow the instructions on the canning recipe!
“The Pressure Canner May Explode!”
This old wives’ tale has been out there for decades. There’s always a story floating around that someone’s mother, aunt, or neighbor had a pressure canner that blew up in the kitchen, taking with it all those around it. So prevalent has this been going around, and for so long, it has stopped people from using it preferring the water bath over the pressure.
What might have been long ago, is no longer. And the stigmatization and the involvement of Pressure Canners in some nefarious acts have led to the modern version of the canner. Just let it be known that it is nearly impossible for a modern pressure canner to blow up. The manufacturers of the modern pressure canners (those built within the last 40 years or so) are equipped with at least one fool-proof safety device; a petcock. The petcock releases steam and pressure when it gets over 15 pounds and has a hard rubber plug that pops out if the pressure gets too high. In addition, many canners, come with both a dial and weight. If the pressure gets too high, the weight jiggles and releases steam and pressure. Something would have to go catastrophically wrong through purposeful actions for today’s models to explode.
Like with your water bath canner, you do need to monitor your pressure canner while it is building pressure and during processing. It’s similar to a deep fryer, you don’t just fill it and go in the other room or outside while it is doing its thing. If you want to ready another batch of food to can, that’s perfectly fine. But check often to make sure the pressure isn’t climbing past the pressure you are processing your food with.
As an added safety precaution, be sure to always check your petcock and steam vents before you can. Run a needle through them to make sure a bit of food hasn’t blown out of a jar and gotten wedged in the vent. In the past, this is usually what blew up the old canners without safety features. The plugged vent let the steam pressure build up until the lid blew off. Again, with modern canners, this is nearly impossible.
“If the Food is Cooked Already, Can I Reduce the Processing Time?”
Any time you can up a batch of food, you have to treat it as if you had just mixed it up fresh. This goes for your own recipes of meals like chili, soup, and stew. It’s always a possibility for bacteria to float into that food between cooking and canning. To be safe, you must process that food as though it were made up fresh and follow the canning directions exactly in your canning recipe. If you don’t, you’ll have incompletely processed food that may go bad during storage or expose your family to the danger of food poisoning.
“My Reusable Jar Lids Don’t Seal Reliably”
 “My Reusable Jar Lids Don’t Seal Reliably”
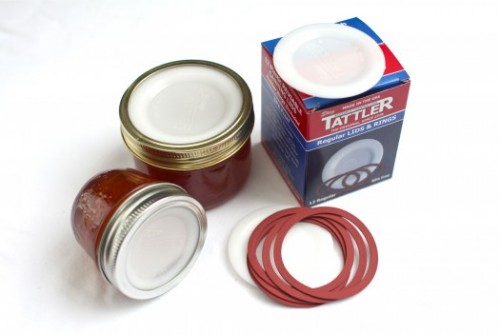
Generally speaking, canning jar lids are a one-time use type of deal. There are some who try the Tattler brand of reusable canning lids and don’t read the directions on the box or they have older jars with difficult-to-understand directions on the box. With regular two-piece metal lids, you pack your food, wipe the rim of the jar clean, place a hot, previously-simmered lid on the jar, and screw down the ring firmly tight. Then it goes into the canner.
Tattler lids are different in the way they seal and you need to be aware of this. They work great for years and years if you follow the directions on the box. You pack your food, wipe the rim of the jar clean, place a hot, previously-simmered lid and rubber on the jar, and screw the lid only fingertip tight. Now that’s barely snug, but it’s just enough to hold the lid on the jar during processing! Most folks mistakenly tighten the ring as with metal two-piece lids (Just don’t do that with the reusable lids.)
When you take the jars out of the canner, immediately tighten the rings all the way and set the jars on a dry folded towel to cool. This is like the old zinc lids with rubbers where the instructions say “complete the seal.” If you follow these instructions, they’ll seal correctly and you can reuse them over and over for decades!
“My Grandma Water Bathed Green Beans”
A general rule to live by when it comes to canning is to know which types of foods can better in either the Water Bath Method or the Pressure Steam Method of Canning. Take those foods that are considered Low-acidic. Boiling temperatures kill molds and yeast, along with some forms of bacteria. But it does not kill the bacteria that cause botulism (food poisoning) or their toxins. To kill these bacteria, food in your jars must reach 240 degrees; a temperature that is only reached inside a steam-pressure canner.
Again, always read the directions (from a modern canning recipe) for each and every food you can. All low-acid foods, including green beans, vegetables, meats, poultry, and fish (and recipes including them) must be processed in a pressure canner.
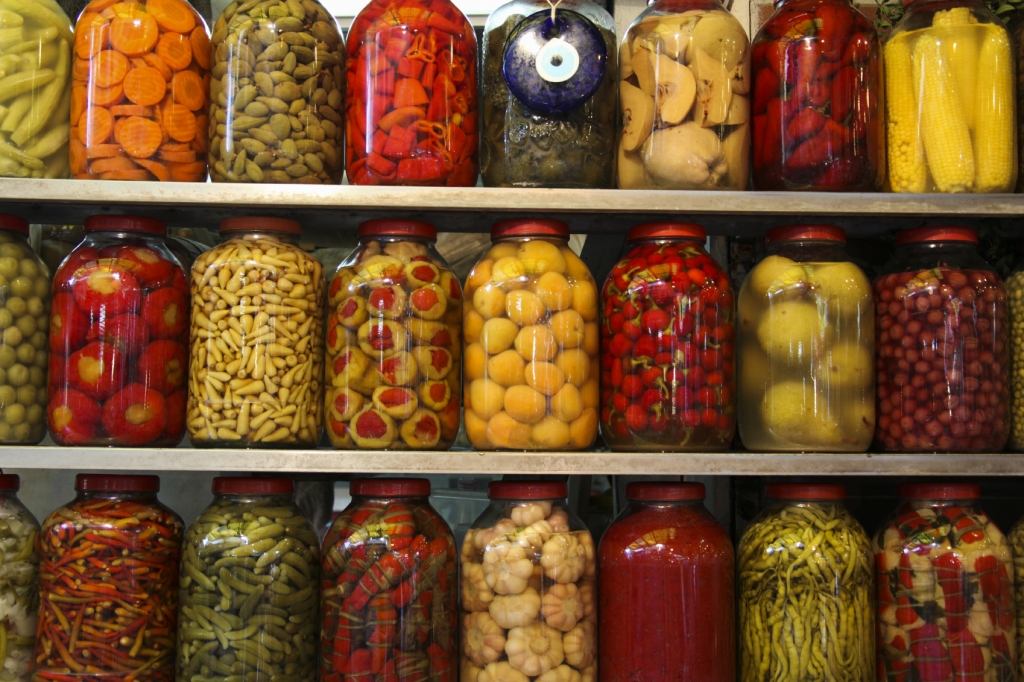
On the other side of the dial, those foods considered High-acidic; Peaches, Pears, Pickles, Salsas among many others are just fine when it comes to the Water Bath Canning process. Being highly acidic tends to discourage bacteria, like botulism, to form. Again follow the instructions you find on your Canning Recipes you gather and follow them to the ‘T’.
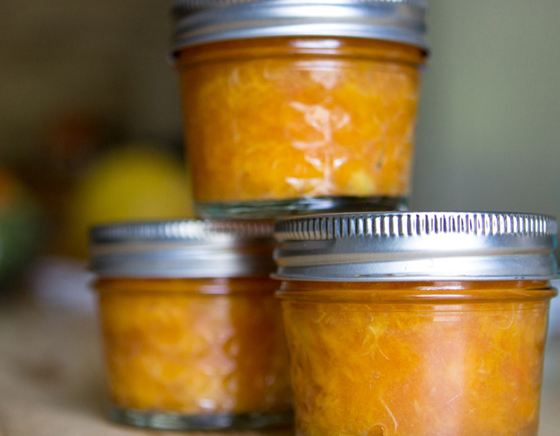
“My Canned Fruit is Floating in Liquid in the Jars”
There is nothing to worry about. The fruit crowds near the top of the jar with lots of syrup or juice below it. Raw packing the fruit is generally what causes this. If you simply heat your fruit in their syrup or juice, they won’t float in the jars. Be sure to pack your fruit well without smashing it into your jars. The fruit will slightly shrink in processing.
“My Pickles are Shriveled Up”
This most often happens when you are canning whole pickles, usually sweet gherkin-type pickles. There are two common causes of shriveled pickles. The first cause is that too much sugar was added to the cucumbers at one time. Follow your recipe to the letter and add the sugar over the period of time indicated. The second cause is not pricking the cucumbers with a fork before soaking them in the brine. Pricking lets the brine penetrate each cucumber, plumping it up during brining.
Although they might be all wrinkled, don’t worry those shriveled pickles are still good to eat and mighty tasty.
“The Pickles Turned Out Soft and Limp”
There are quite a few reasons that pickles get soft after processing. The most common I can think of is when you boiling them for too long in the process. Pick a recipe that requires little to no boiling before packing and a very short time in a boiling water bath canner. My grandma’s best pickle recipes required no water bath processing and the pickles were always sealed and crisp. The way to do that is to pack them cold in the jars, then pour the boiling brine quickly over them, and then fasten the lids and rings in place. Every jar sealed and remained sealed with a 5 or so minute bath. Some recipes require 1 or 15 in.
Remember, the longer you boil pickles, the softer they tend to get. Some folks add grape leaves or powdered alum (pickle-crisp) to the pickles to help them stay crisp, try them out and see how you like that avenue if you so wish.
Another cause of limp pickles is not removing the blossom end (as opposed to the stem end) of each cucumber as it is prepared. Be sure to trim it off completely to remove any bacteria or mold-causing organisms present.
Yet another cause to look out for is using weak vinegar or brine that is too weak (often made so by diluting it with water) also causes limp pickles. Be sure to cover all of your pickles in the jar with brine. Those that stick up out of the brine will become soft and soggy.
Only use 5% acidity vinegar in the brine. If you use homemade vinegar, test it to make sure it is strong enough to use in pickling. Also, use pickling salt, not common table salt. Table salt contains iodine, a necessary supplement to diets, but it can cause pickles to get soft or discolored.
“My Jam or Jelly Didn’t Set Up At All”
 “My Jam or Jelly Didn’t Set Up At All”
This can happen, even to the best of us who can. Personally, I don’t worry about it and just use the unset spread as syrup over pancakes or ice cream. It’s sweet, fruity, and thick enough not to be too runny.
Most often if it doesn’t set is from you tweaking the recipe in one way or another from the recipe. Don’t add extra fruit juice to your recipe, thinking that you can get away with adding a little more sugar. It never works out and you’ll be disappointed with unset spreads.
Whether you use a recipe with pectin or not, don’t hurry the boiling of your spread. If your recipe calls for added pectin, add the full amount. Never double a recipe. It often does not turn out well; either it doesn’t set up or it burns.
Try It Again
If you’ve done everything right and the preserves still don’t jell, you can save it and remake it again to get a firmer product. Before re-canning, just remember, some fruit preserves and jellies take up to two weeks to set up.
If you want to remake your jam, jelly, or preserves that have not been set up after two weeks, here’s how:
Without added pectin (boiled down jam, jelly, or preserves):
Usually, when these don’t set, it means you haven’t read or followed the directions correctly. Read them again and recheck your method. If it still seems right, heat the unset product in a large pot until the temperature in the recipe is reached or the jelling point starts. One way to be sure is to have the preserves slide off a clean spoon in a sheet instead of dripping off in drips. Then quickly ladle the spread into hot jars, leaving¼ an inch of headspace. Place a hot, new, previously-simmered lid on the jar and screw down the ring firmly tight. Process in a water bath canner for the time required in the original recipe.
Spreads made with liquid pectins, such as Certo:
To remake failed jelly or jam which has been made with liquid pectin, just do 8 pints at one time. For each cup of unset jelly:
- Measure out 1½ tsp. liquid pectin
- 3 Tbsp. sugar
- 1½ tsp. lemon juice
Place failed preserves (or jam or jelly) in a large saucepan and bring to a boil, stirring constantly to prevent scorching. Quickly stir in sugar, lemon juice, and liquid pectin. Return to a rolling boil, stirring constantly. Boil hard for one minute, stirring constantly. Remove from heat. Ladle the hot jam/jelly into hot jars, leaving¼ an inch of headspace.
Then, place a new, hot, previously-simmered lid on the jar and screw down the ring firmly tight. Process in a boiling water bath canner for the time required in the original recipe.
Spreads made with powdered pectins, such as Sure-Jel:
To remake failed jelly or jam, only do 8 pints at one time. For each cup of spread:
- measure 1½ tsp. powdered pectin
- 1 Tbsp. water
- 2 Tbsp. sugar
Set sugar aside in a separate bowl. Combine pectin and water in a large saucepan and bring to a boil, stirring constantly to prevent scorching. Bring the pectin and water to a boil over medium heat, stirring frequently to prevent scorching. Add unset preserves (or jam or jelly) and sugar, stirring constantly to prevent scorching and to mix thoroughly with pectin mixture.
Bring to a hard boil for 30 seconds. Quickly ladle into hot jars, leaving ¼ inch of headspace. Place a hot, new, previously-simmered lid on the jar and screw down the ring firmly tight. Process in a water bath canner for the time shown in the original recipe.
“Food in My Jars On the Shelf is Getting Discolored and Pale”
This is common when your canned food is stored in conditions with too much heat and/or light present. Wherever you have them stored, the heat, or access to the sunlight is working on the food. Canned foods should be stored in a dark, cool location, such as a dry basement that is not subject to freezing temperatures. The discolored food looks unappetizing and may soften (especially fruit), but as long as the jars remain sealed, the food should be okay to use.
Overall TakeAway
Home-canning is a fantastic life skill to learn and practice. Like all types of arts, the more you can, the better you’ll get at it and the more confident you’ll get, as well! I’ve had to deal with a lot of these common problems over the years in my own canning and with the canning mistake renditions, you’ll be able to solve some of your own mistakes and avoid making others. Enjoy, Godspeed and God Bless!


