Why Mylar?
If you have ever seen the difference between plastic balloons and the Mylar balloons on how long the helium lasts within each and keep floating, you can see how much better the Mylar material keeps their seal. Mylar is a lot tougher than a lot of food packaging style bags. It is obvious this makes it more suitable for long-term storage, especially if conditions are less than ideal (storage environments and fluctuating temps for example). Vacuum bags are handy but they are also susceptible to losing nutrients from light exposure resulting in the need for storage in darker containers to protect from the sunlight. Mylar is an excellent choice for those that simply don’t care to use a plastic bag.
Mylar also protects odors from being detectable. So if you like minced garlic and store it in a sealed mylar bag, you are not going to be able to smell it one wit.
 What is Mylar?
The term “Mylar” is actually one of many trade names for a polyester film called BoPet film. For the technically inclined and the curious, that stands for “Biaxially-oriented polyethylene terephthalate”. (We’ll use Mylar from this point forward!) Developed by DuPont in the 50s and was first used by American Space Program for mylar blankets and long-term storage as it increases the shelf life of food by eliminating oxygen.
Just think, it’s like superpowered aluminum foil.
Since then, the many uses for Mylar have been embraced commercially due to its high tensile strength and its moisture, light, gas, and aroma prevention properties. For all of these reasons and more, Mylar bags are considered the gold standard when it comes to long-term food storage. We mentioned in another article found here that Vacuum Sealing with regular plastic bags gives you a “shelf-life” of around 18 months. Using Mylar can double that time versus plastic.
Mylar Bag Thicknesses
When you look to purchase your Mylar bags you should check and see what thickness you are getting for your money. Some are the thin metal polyester film that you can see through. While this may be fine for some purposes or shorter-term storage needs, getting the thicker bags that are in the 5.4 mm thickness range are a better idea for your heavy food storage items and that scrumptiousness you want to store for the long term.
Grains (wheat, oats, rice for example) can keep up to 25 years if properly sealed and stored and they weigh a lot for the volume they take up in a bag.
What Sizes of Mylar Bag Should I Use?
The two most commonly used sizes are the one-gallon size Mylar bag (approx. 10” x 14”) and the five-gallon size (approx. 20” x 30”). Various other sizes are available but for starters, these are the two average sizes to start out with.
The gallon bags are ideal for grains, dried powdered foods (like powdered milk), spices, hard candy, salts, and other baking ingredients. In addition, gallon bags can be useful for protecting non-perishable items you want to keep dry or sterile like medical kits and ammunition. When you are shopping for gallon-sized bags, you should only buy nothing less than a minimum thickness of 3.5 to 4 mil.
The larger 5-gallon bags are can and are regularly used to line a 5 or 6-gallon plastic bucket. for double protection from the elements and the creepy crawlies during long-term storage. You will want to be sure to use food-grade buckets as well as food-grade mylar foil. The bag should be sealed after you fill it and before closing the bucket with a tight-fitting lid.
Because of the weight of the contents, you choose to fill it up with, the thickness of a 5 gallon Mylar bag should be 4.5 mils or more. And, just so you know, the thicker the bag, the tighter the weave of the polyester – that is what gives it its strength. As a matter of fact, you will find bags that are 7 mil and even thicker but for most uses, 3.5 mil to 5 mil will work just fine.
Step by Step – Storing Bulk Foods in Mylar Bags with Oxygen Absorbers
- Get your supplies in order. You will need:
- Mylar bags
- Oxygen absorbers
- Vacuum Sealer or at the very least a cheap hair straightening iron
- A jar that will hold the oxygen absorbers until they are needed
- Have all of your bulk foods ready to go before you open up the package of oxygen absorbers.
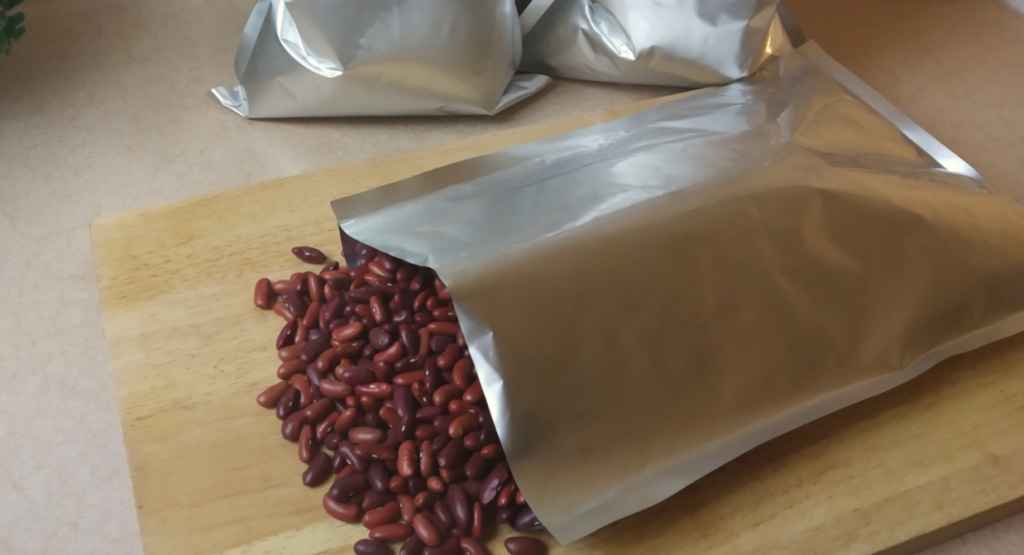
- It is easiest to pour bulk items into the Mylar bag.
- Set the opened Mylar bag in a container so that it stays upright during the filling process.
- You can also scoop your food into the bag using a measuring cup. Or you can pour your bulk food directly from its original package into the bag.
- The oxygen absorbers are still tucked away in their jar, limiting their exposure to open-air until the very last minute.
- When you fill the bag, you are going to want to leave a few inches of space at the top.
- This will allow you to create a thick seal across the top.
- Before starting the sealing process, you are going to want to create an assembly line of filled bags so that when you are ready, you can seal them all at once.
- Once your bags are filled, pop an oxygen absorber (O2 absorber) inside.
- For a 1 gallon bag, the rule of thumb is to use a 300 cc O2 absorber.
- For a larger, 5 or 6 gallon bucket-sized bag, 2,000 ccs.
- I take the oxygen absorber and stuff it down into the middle of the food.
Before moving on to the next step, you are going to want to put the lid back on your jar of unused oxygen absorbers or seal them back up in a bag.
How To Seal Mylar Bags
Depending on the type of sealer you have:
- You are now going to run the unit or iron across the top of your bags
- Do not worry if there appears to be air stuck in the already-sealed bag.
- The oxygen absorber will do its job, the bag full of food will compress and become brick-like.
- If you have a regular straightening iron you can use it carefully without the vacuum suction aspect of a sealer.
- A hair straightening iron is much more convenient for most people.
- When done, get out your sharpie and label the outside of the package with both the contents and the date.
Three or so hours later, the filled bags will be like bricks. Sometimes some bags may take longer for the absorbers to do their job, some foods will take longer to compress than others.
The Next Step
When you are satisfied that the bags have a proper seal, you can move them to your food storage pantry. You do want to be mindful of the six spoilers of food storage and keep your food as cool and dry as possible. For extra protection, especially from critters, pop your brick-like foods packages into a tightly lidded bucket and you will be set. You can get mylar bags that fit in a 5-gallon bucket. If you seal food in mylar and then seal with a 5-lb bucket gamma lid, you have some very protected food for your very long-term good stash.
Here are more Mylar tips.
- Check your sealer bags for any damage before using them. It’s no bueno to have holes in them to compromise the seal.
- When wanting to seal pasta, feel free to seal them in its original packaging. Cut a little hole in the package first, so that the oxygen absorber can do its job.
- Don’t overfill the bag. Remember that your oxygen absorber will suck out the oxygen, leaving only nitrogen in the extra space.
- Only seal the top inch of your bag while leaving a couple more inches of space. If you need to cut open the bag to remove the product, you will have the space to seal the bag back up again.
- Just don’t forget to add a fresh oxygen absorber. Try to avoid opening the bag too often, repeated exposure to the air will impact your food’s shelf life.
- If you are sealing up a powdery substance such as flour, wipe the inside edges first so that any residual dust is removed. This will ensure a good seal.
- Check your newly sealed bags a few days after closing them up. They do not have to be brick-like but they should be noticeably compressed. If not, there is a likelihood that the seal was not good or a hole was poked in the Mylar.
- Give it another week and if it still is not compressed, cut it open and start over.
- Heat is your enemy regardless of the packaging. Store your packaged products well below 85 degrees.


 What is Mylar?


